Preparation
You will need the help of 1 or 2 other people to assist with positioning and monitoring of the patient as well as filling the evacuated containers and specimen tubes. Before beginning the procedure, verify the patient's identity, the procedure indications, and ensure that the needle insertion site is correctly marked. A recent chest radiograph confirming the presence of a pleural effusion should be available.
IV access should be established before the procedure in most cases. Atropine should be on hand in case of profound vasovagal response, and supplemental oxygen should be administered throughout the procedure as necessary.
- Position the patient seated on the edge of the bed, leaning forward, with their arms resting on a bedside table. If the patient is unable to sit up, the lateral recumbent or supine position may be used
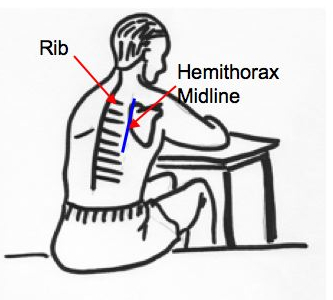
- Estimate the level of effusion based on clinical exam (decreased/absent breath sounds, dullness to percussion, decreased/absent fremitus)
- The needle insertion site selected should be 1 or 2 intercostal spaces below the level of effusion and 5 to 10 cm lateral to the spine. Do not insert the needle below the level of the ninth rib so as to avoid extra-thoracic needle insertion.
- Mark the site
- Cleanse the site with antiseptic solution
- Apply a sterile drape
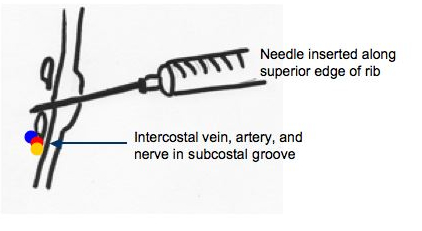
- With a 25-gauge needle, anesthetize the skin overlying the superior edge of the rib BELOW the intercostal space selected
- Insert the 22-gauge needle and "walk" it along the superior edge of the rib, alternately injecting anesthetic and pulling back the plunger every 2 to 3mm to rule out intravascular placement
- Avoid the vessels and nerve located along the inferior edge of the rib
- Once pleural fluid is aspirated, stop advancing the needle and inject anesthetic to numb the parietal pleura
- Note the depth of penetration before withdrawing the needle (you may choose to mark the depth on the needle with a hemostat)