IV Access
Step 2: Insert catheter
- Prepare and inspect the catheter.
- Stabilize the vein and apply countertension to the skin.
- Insert the stylet through the skin and observe for "flash back" as blood slowly fills the flash back chamber.
- Reduce the angle
of the needle and advance approximately 1 cm further into the vein. Students are often unsuccessful at establishing IV access because this step is omitted. Remember, by reducing the angle and advancing further into the vein, you are ensuring that the catheter (and not just the needle) is in fact inside the lumen of the vein.
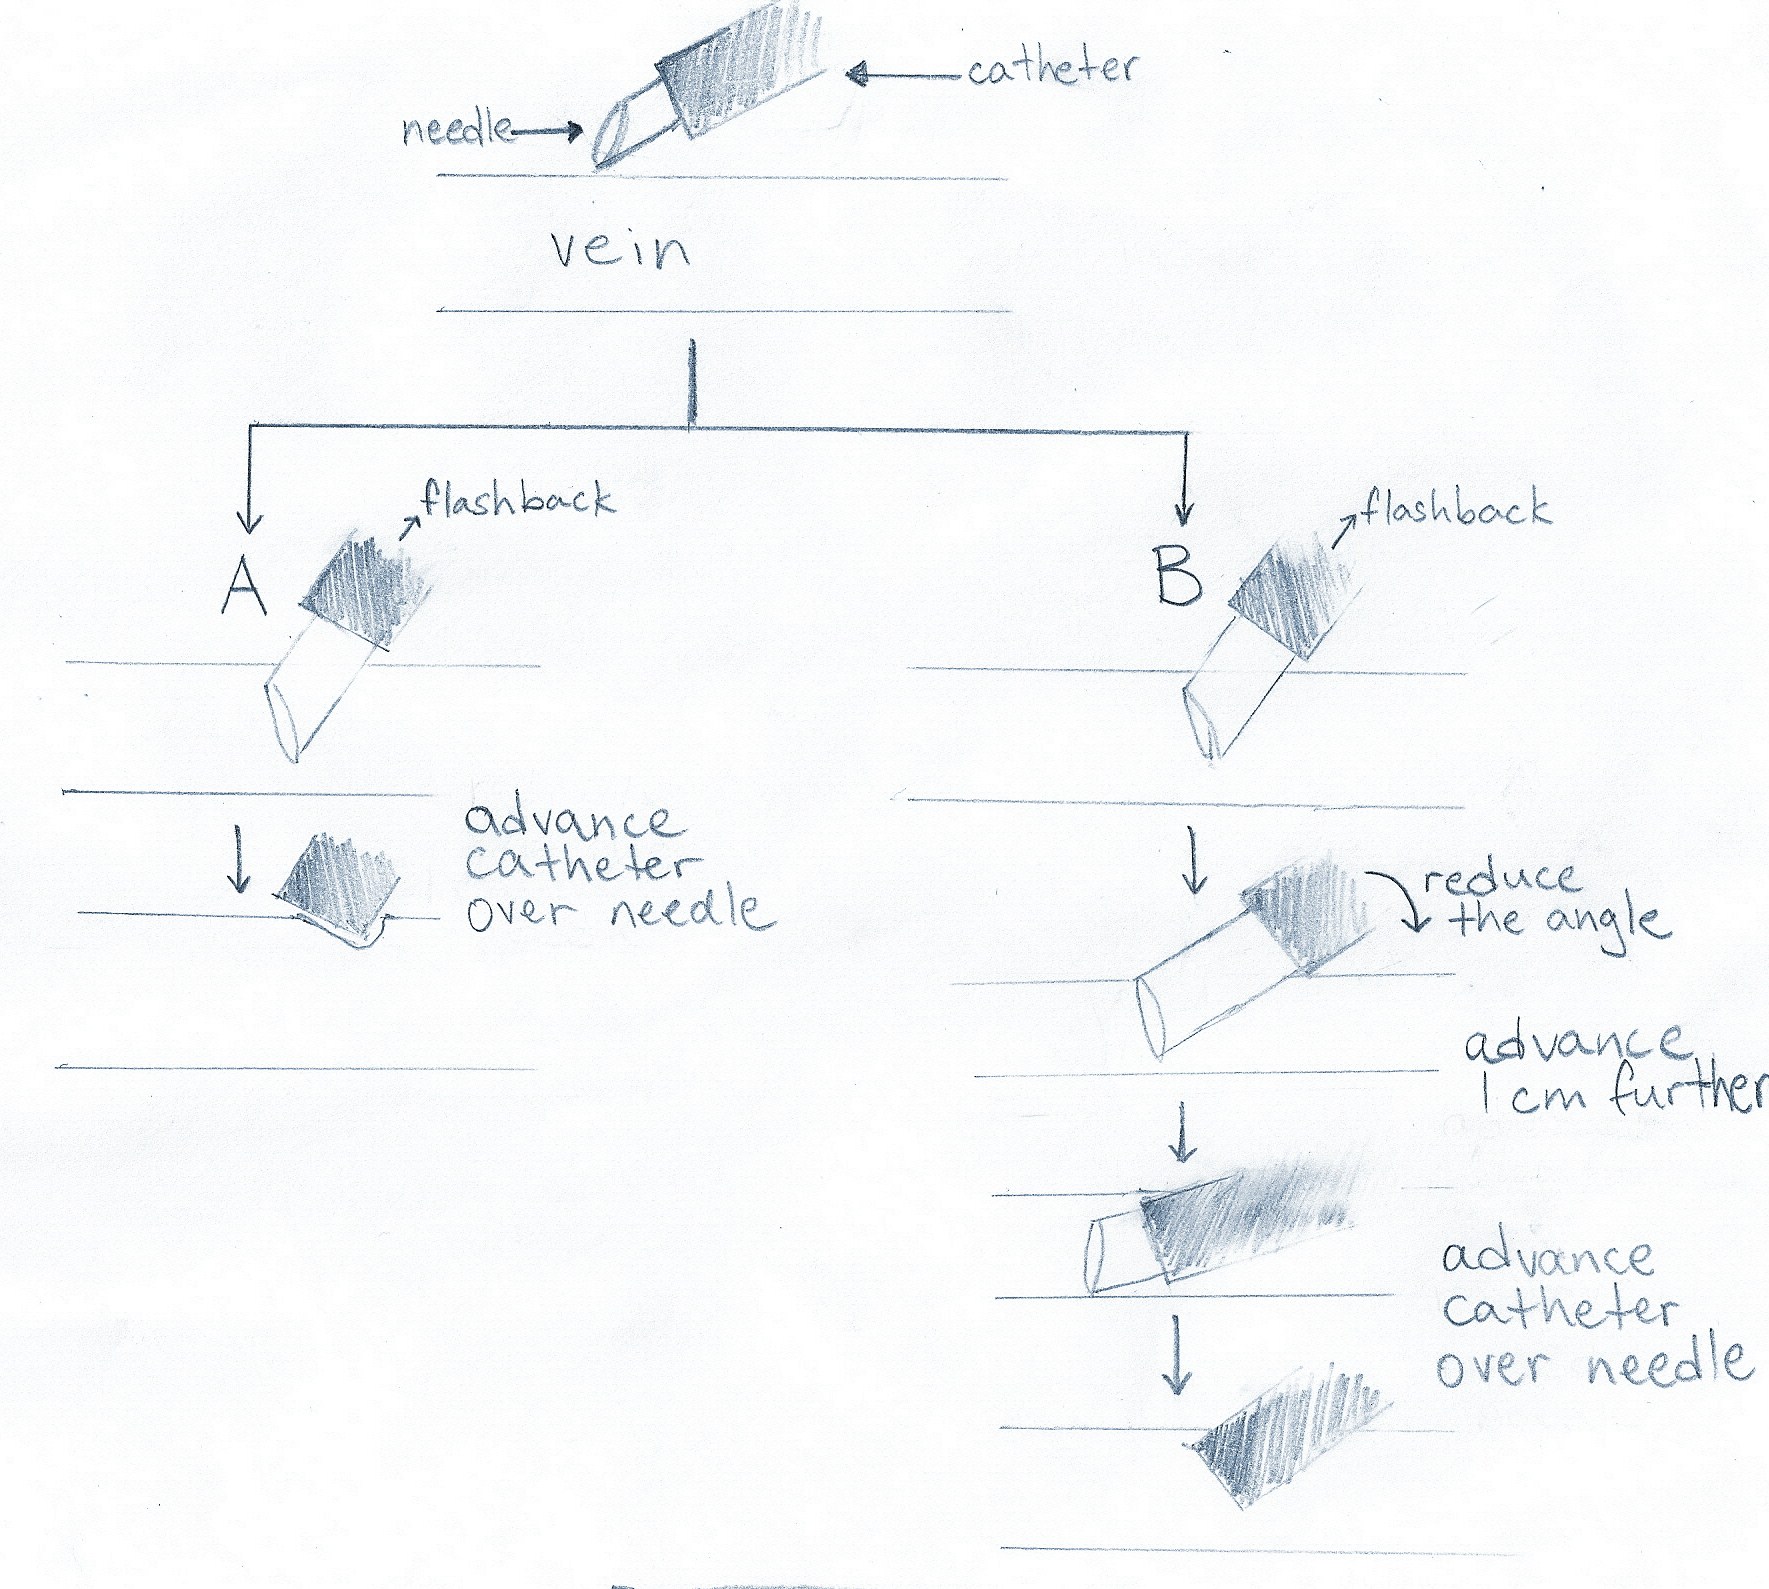
- Slowly advance the catheter over the needle and into the vein while keeping tension on the vein and skin.
- Press the white button and observe the spring-loaded needle disappear into the stylet.
- Place the stylet into the sharps container.
- Remove the tourniquet.
| Head-on view | Side view |
|
|
|